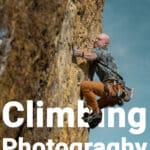
How to Take Better Climbing Photos!
Intro
If a tree falls in the forest and no one is around to hear it, did it make a sound? Scratch that, if a rock climber goes climbing, and doesn’t share it on social media, did they actually go climbing? It today’s digital there’s an entire market built on social media and making it easier (and higher quality) to capture yourself. The amount of professional quality devices for personal use is astounding, personal drones, gimbal 4k action cameras, smartphone 4K cameras with ultra-wide & zoom capabilities, and tripods that track you. For the sake of this article lets divide photography into two distinct categories, snap shots and artistic. Snap shots are very casual pictures, just pull your phone out and capture what’s going on around you, not much thought behind them. With the invention of the smart phone, everyone has a camera on them, and the amount of media that is created is exponentially growing.
Not every photo needs to be dramatically planned out, snap shots are fun to way to capture events, people, points in time, so you can later look back at them and remember! Artistic photos require a little more preparation and execution. There are so many factors and variables to consider, and so many ways to take your photos from good to great. Making the jump from snapshots to artistic photos can be a little tough at first, but hopefully after this article you will look at capturing images a little differently. Have you ever looked at a photo and just thought wow? I want to be there or be on that climb? Could be inside or outside. These images can entice us to travel to specific places and climbs, inside or outside!
To the average person climbing is cool because it has that wow factor, a simple snapshot is going to impress a lot of people. It’s got that wow factor, people can’t believe someone would want to hang on by their fingertips sixty feet off the ground. Show the average person a snapshot or an artistic photo and they are going to be amazed. As climbers we have higher standards. The blurry butt shot from the ground starts to get a little repetitive, and don’t impress our fellow climbers as much. So, let’s start with the basics. In this article we will talk about improving snapshots, camera settings, climbing specific variables & factors, simple standards to follow, types of climbing photos, and environmental details.
Improving snapshots,
When we first start climbing the main photo we want to take is the “Hey look what I did photo”. It’s simple, we are high up on the wall, and we want to show off what we climbed. You hand your phone to your friend and have them snap a couple pics on your way to the top. Not a lot of thought besides point and shoot. What we are left with is a lot of ‘from the ground butt shots’, usually blurry, and maybe a little chalk on the lens. It got the job done though, you now have an image of you high off the ground. A simple way to make these snapshots better is to have your friend change the angle, a shot from the side or a better vantage point. This takes your image from a simple spectators point of view, and gives the audience a better view to the action. This does a better job showing you off, the subject, and what you are doing. Often times we want a picture because something on the route felt cool or made us proud. Pulling a roof high up, a cool heel hook, or maybe it’s a no foot campus section. Communicate with your snap shotter, give them an idea of what you are trying to capture and a direction to take. So instead of swiping through 50 butt shot photos to find the perfect image you wanted, you get that cool move or sequence.
Camera settings, climbing specific variables & factors,
As you get more into climbing photography, being able to reliably take a nice exposed crisp image becomes more important. Whether you are on a smart phone or have made the jump to a digital camera, understanding settings is going to become increasingly more important. Our goal is a nice sharp image that is properly exposed. That’s where shutter speed, aperture, and ISO come into play. New smart phones have the ability to control these factors to a degree, but with a digital camera we get a lot more control.
Shutter Speed
Climbing is an action sport, and while we might not move as fast as an NBA player dunking, there is still a speed component. The last thing we want is motion blur on our climber, knowing the climb and climber can help when deciding how fast to shoot. As a guide a slow climber on a slower more technical route try and set shutter speed to 1/250th or 1/320th, a more powerful and fast climb like a dyno, dead point, or competition style run and jump being at or above 1/1,000th of a second is necessary. Every climb and climber is different, so this is just a range. Take a photo and inspect for any motion blur, and then adjust accordingly. If there is blur start increasing your shutter speed until the blur disappears. Always set shutter speed first, if our climber is blurry, our photo is doomed from the start!
Aperture
Once we have our shutter speed, we want to start adjusting aperture and ISO. This will allow us to get a photo that is properly exposed (not too bright, not too dark). I adjust aperture next, since there is an artistic element to it. Aperture will let us control the depth of field. A low aperture will have a very small depth of field (lots of background blur, and a high aperture will keep everything sharp). Somewhere between our lowest and highest aperture is a sweet spot for our photo. Too open of an aperture and your climber’s face might be in focus but their body might be out of focus. Aim for a sweet spot where your climber’s entire body is crisp and sharp, but the background starts to blur. This separates your subject from the environment and makes them pop more.
ISO
Lastly, we will set our ISO, which is how sensitive our sensor is to light. The lower the better, but not at the cost of an underexposed (too dark) photo. The lower the ISO the cleaner and less noisy the photo, the higher the ISO and you will see more noise, or a grainy effect, on the photo.
We adjust ISO last, because it would be better to have an image with noise, and a sharp subject, than to have no noise and a blurry subject. Play around with settings! Figure out how low you can push shutter speed, how open you can take aperture and still keep your subject sharp, this will allow you to use the lowest ISO.
Simple standards to follow,
I separate climbing photos into one of two main categories, portrait and landscape. Here are a couple simple guidelines I follow depending on the shot I am trying to take.
Portrait
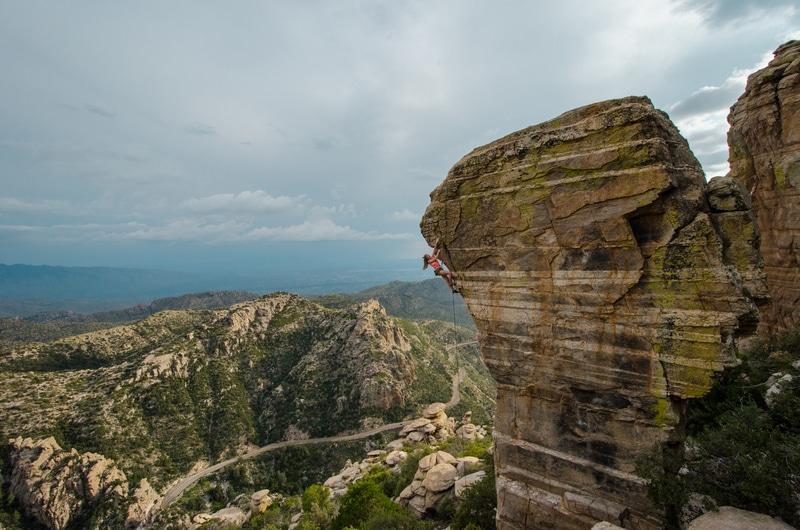
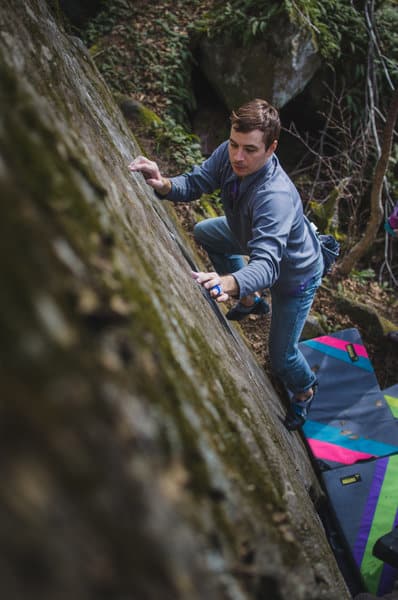
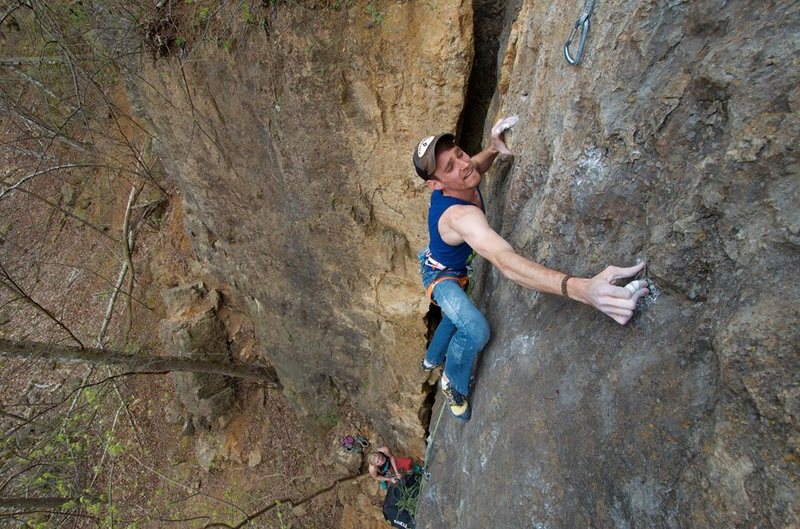
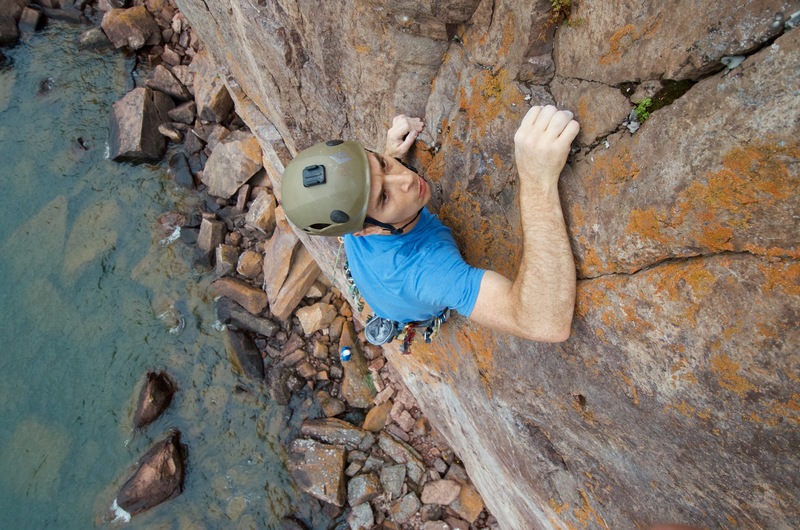
Having consumed a ton of climbing media, the photos that feel special and stand out to me all have several things in common. I like to see the entire climber, no cropping out hands or feet, a full body shot that conveys the climb and movement. The climber is either the subject or a key aspect of the environment. When the climber is the subject think of the photo as a portrait, a view of the face is very important, bonus points for a try hard and focused faces. Extra bonus points for a helmet and necessary safety gear. This can convey a lot of emotion to the viewer. Including the hands and feet gives an idea of what the route is demanding, I always aim for both hands and both feet, but if one foot is hidden that is okay too. Try to capture an engaging part of the route, distinct features, or moves. The climber could be doing a large move, holding onto very small holds, or engaged in something technical like a heel hook. Try to avoid clipping and chalking up poses, as they get repetitive and don’t really speak to the route.
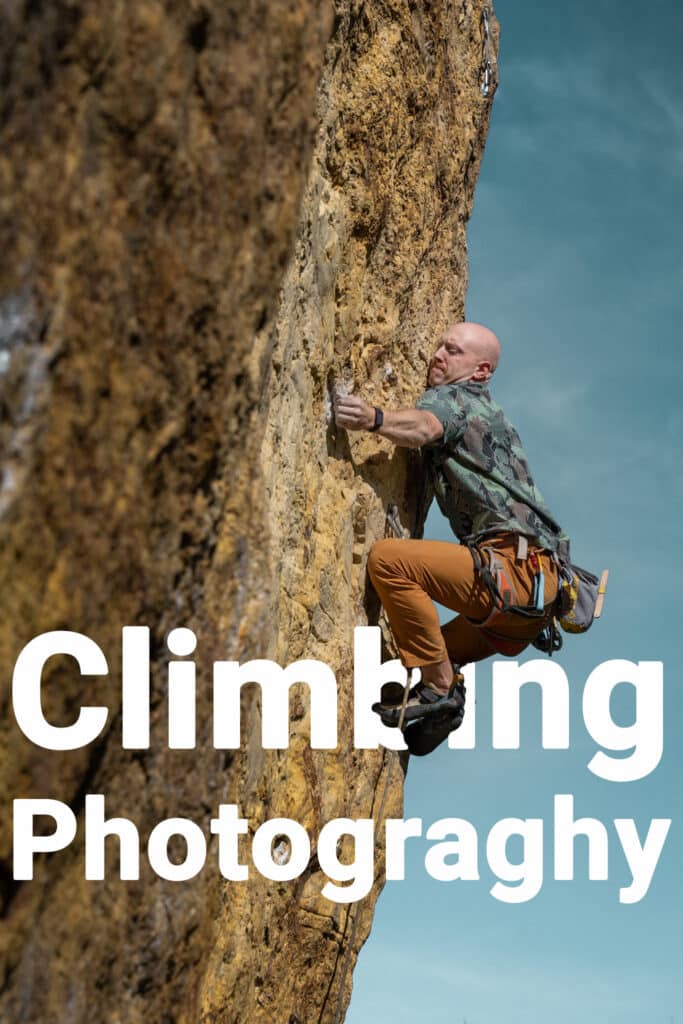
Landscape
In a landscape climbing photo, the climber is still an integral part of the photo, but you should be showing off the unique landscape, cliff, or boulder you are climbing on. Apply the same rules as a portrait and try to capture your climber in an engaging section of movement. Moves where the climber is spread out will make your climber pop out more, and easier to spot, when taking up a little piece of the landscape.
Tips and tricks
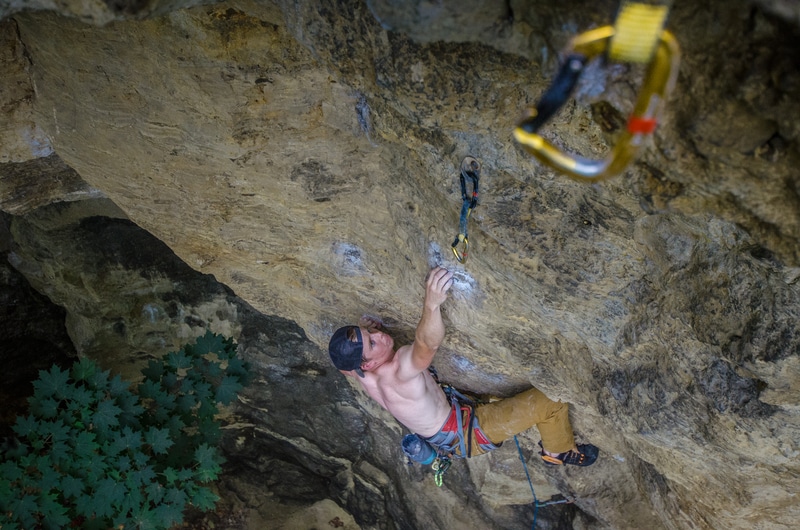
Ascend! Get on your climber’s level. Shots taken at or above the climber provide a unique experience for the viewer, especially if they haven’t climbed before. It also puts you right in the action.
Experiment with different lenses, far too often I see rope climbers going to their zoom lens, and boulderers going to their ultra-wide. Switch up your style and get uncomfortable. If you always shoot a boulder with an ultra-wide, a zoom lens will force you into new shooting positions. Bring an ultra-wide up a rope, this can make for a great closer photo that also shows off the landscape. An ultra-wide on a rope can also give the photo a more dizzying effect, emphasizing just how high up the climber is!
Emulate other photographers! See something you like? Try to recreate it, put your own spin on it. Just like climbing, photography we can learn so much by copying what others have done before us.
Get creative, a butt shot from the ground is always bad? No! Use the belayer as a foreground element, the rope as a leading line, and the climber as the subject for a refreshing take on an otherwise played out image.
Break the rules! The climber is the subject? Not always, incorporate the route into the photo, make a key hold or feature the subject. There’s a hard dead point move to small crimp, an ultra-wide focused on the hold right as the climber is about to latch on can make a great photo!
B-roll footage! A portrait shot is great feature photo, a landscape shot gives you context and location, but capturing the day to day of the crag can create an engaging story. Shots of the climber tying in, putting their shoes on, a look of disappointment or excitement when they fall or succeed, or climbing gear on a harness. These smaller scenes create a vibrant story when paired with your portrait and landscape shots.
Safety! Make sure you are using the proper safety gear and not interfering with the climber, or others climbing in the area. Make sure all equipment has leashes so you don’t drop and damage valuable gear or injure those on the ground.
Work smarter not harder! Ascenders will save you time and effort getting into those hard to reach places. A Bosun’s Chair from Black Diamond will save your legs as you hang out on the wall. Slings, cams, and nuts can be used to keep yourself in the ideal shooting position.
Don’t take the easy shot, don’t just point and shoot, walk around and find unique angles and positions. Get high, get low, find the angles.
Review your photos! Nothing is worse than thinking you took a bunch of great images just to find out they are blurry incorrectly exposed. Review through out the session and adjust as needed!
Climbing is dangerous, it involves inherent and other risks and cannot be eliminated. The information presented here does not describe all of the risks associated with climbing and is not intended to replace or supersede expert instruction and training.
© 2024 Vertical Endeavors, Inc. All rights reserved. The contents of this article, photographs, and graphical representations are protected by U.S. and International copyright laws. Reproduction and distribution, in part or whole, without written permission from Vertical Endeavors are prohibited. The opinions and information contained in this article are for entertainment and informative purposes. They are those of the author and may not represent those of Vertical Endeavors, and do not necessarily reflect the ideas, ideologies, opinions, or points of view of the organization, affiliates, owners, stockholders, partners, suppliers, licensors, or staff. Under no circumstances shall Vertical Endeavors or any entity that is, has been, or will be affiliated be liable for any indirect, incidental, consequential, special, or exemplary damages arising out of or in connection with the information contained in this article.